maandag 20 oktober 2014

Muiderslot

Today, we visited the Muiderslot. "The most beautifull and best kept medieval castle in the Netherlands". And also not far from where we live, so we tend to visit it a couple of times a year.

Our first stop is the falconer. And also our last stop during this short visit. We got to take some pictures of the raptors Radja, Calimero, Ollie and of course, the castle.


zondag 24 augustus 2014

Wings for eagle head hiking staff

I got some more time to work on the details of my eagle head hiking staff (building an eagle-head hiking staff). This past few weeks, my wife has kindly been bringing me assorted feathers to create ''wings''  for the eagle head . In fact, she has been bringing me so much feathers, I could easily build my own bird! Thanks, Chris!


But i only needed a few. I choose the magpie tail-feathers, with their beautiful iridescent glow, and a couple of pheasant feathers. A piece of gutted black 550 paracord and some skull beads complete this natural feather tassel for my stick.


The tassel mounts to a leather strip between the head and the staff. 

Hope you like the result, I do!


You shall not pass!


donderdag 7 augustus 2014

Willow hiking staff with leather grip and paracord lanyard.

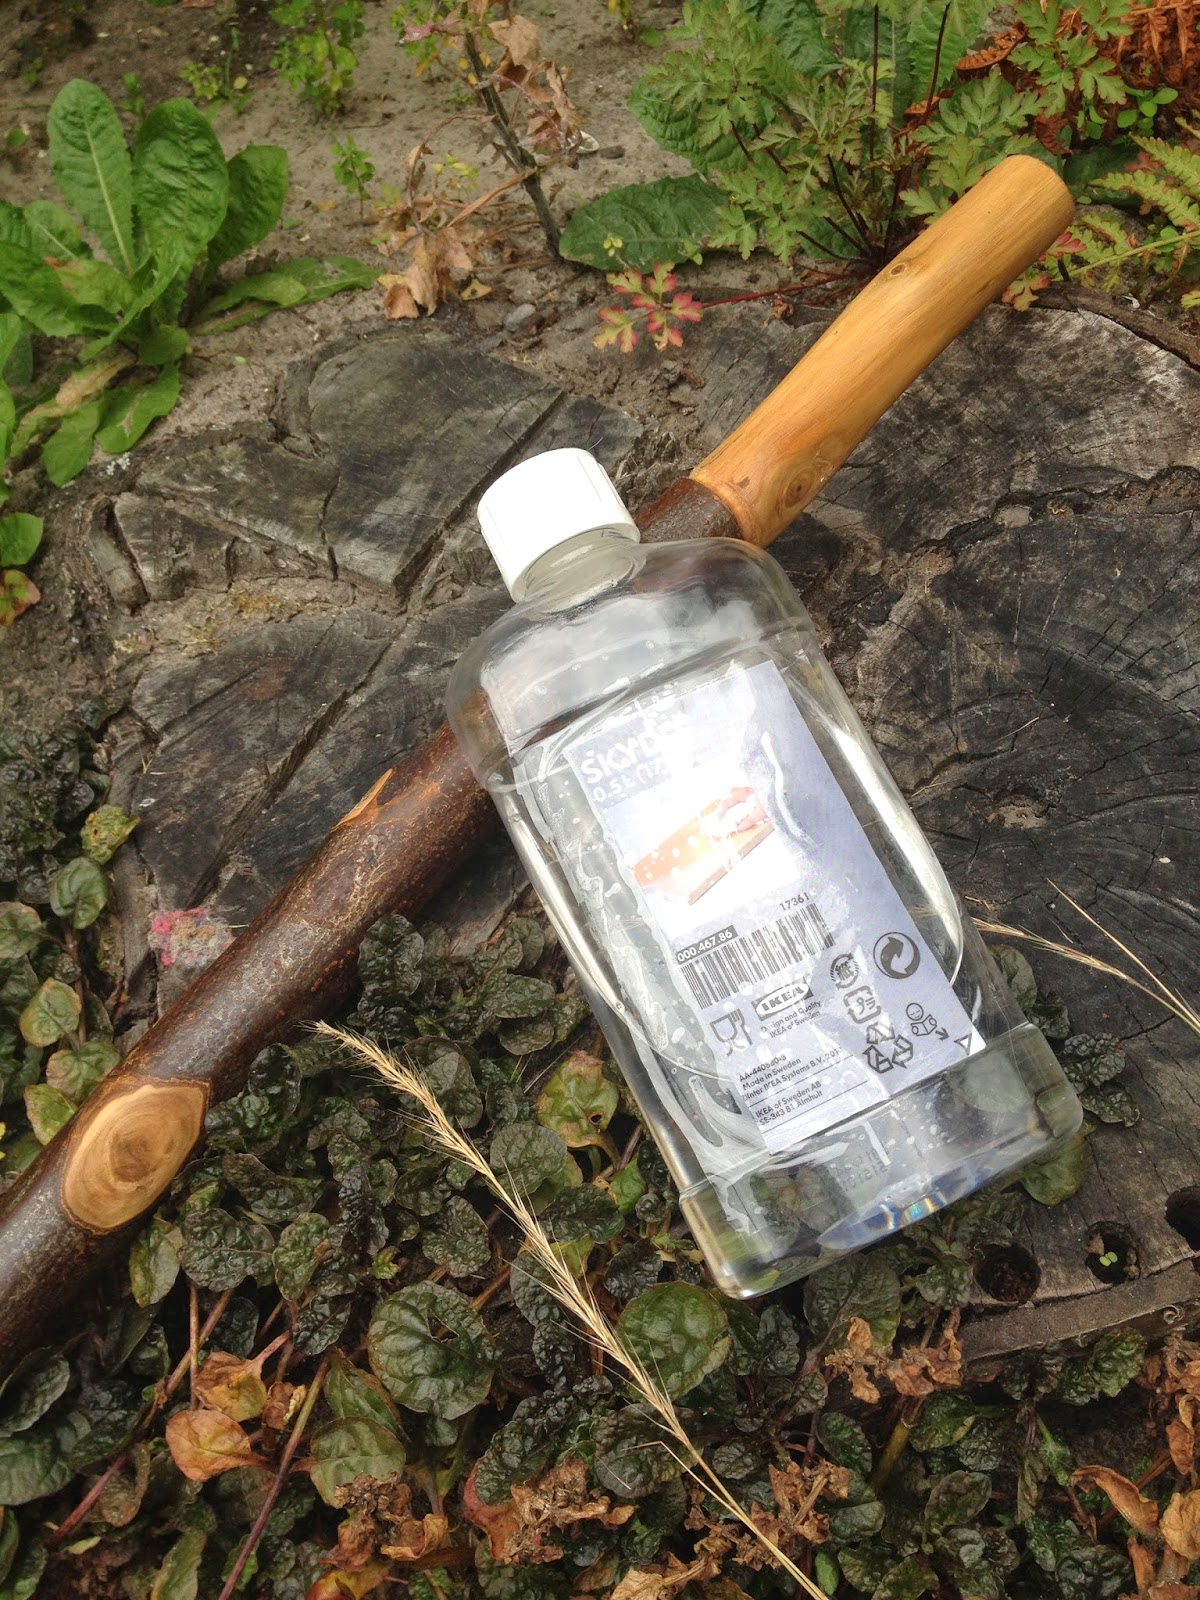
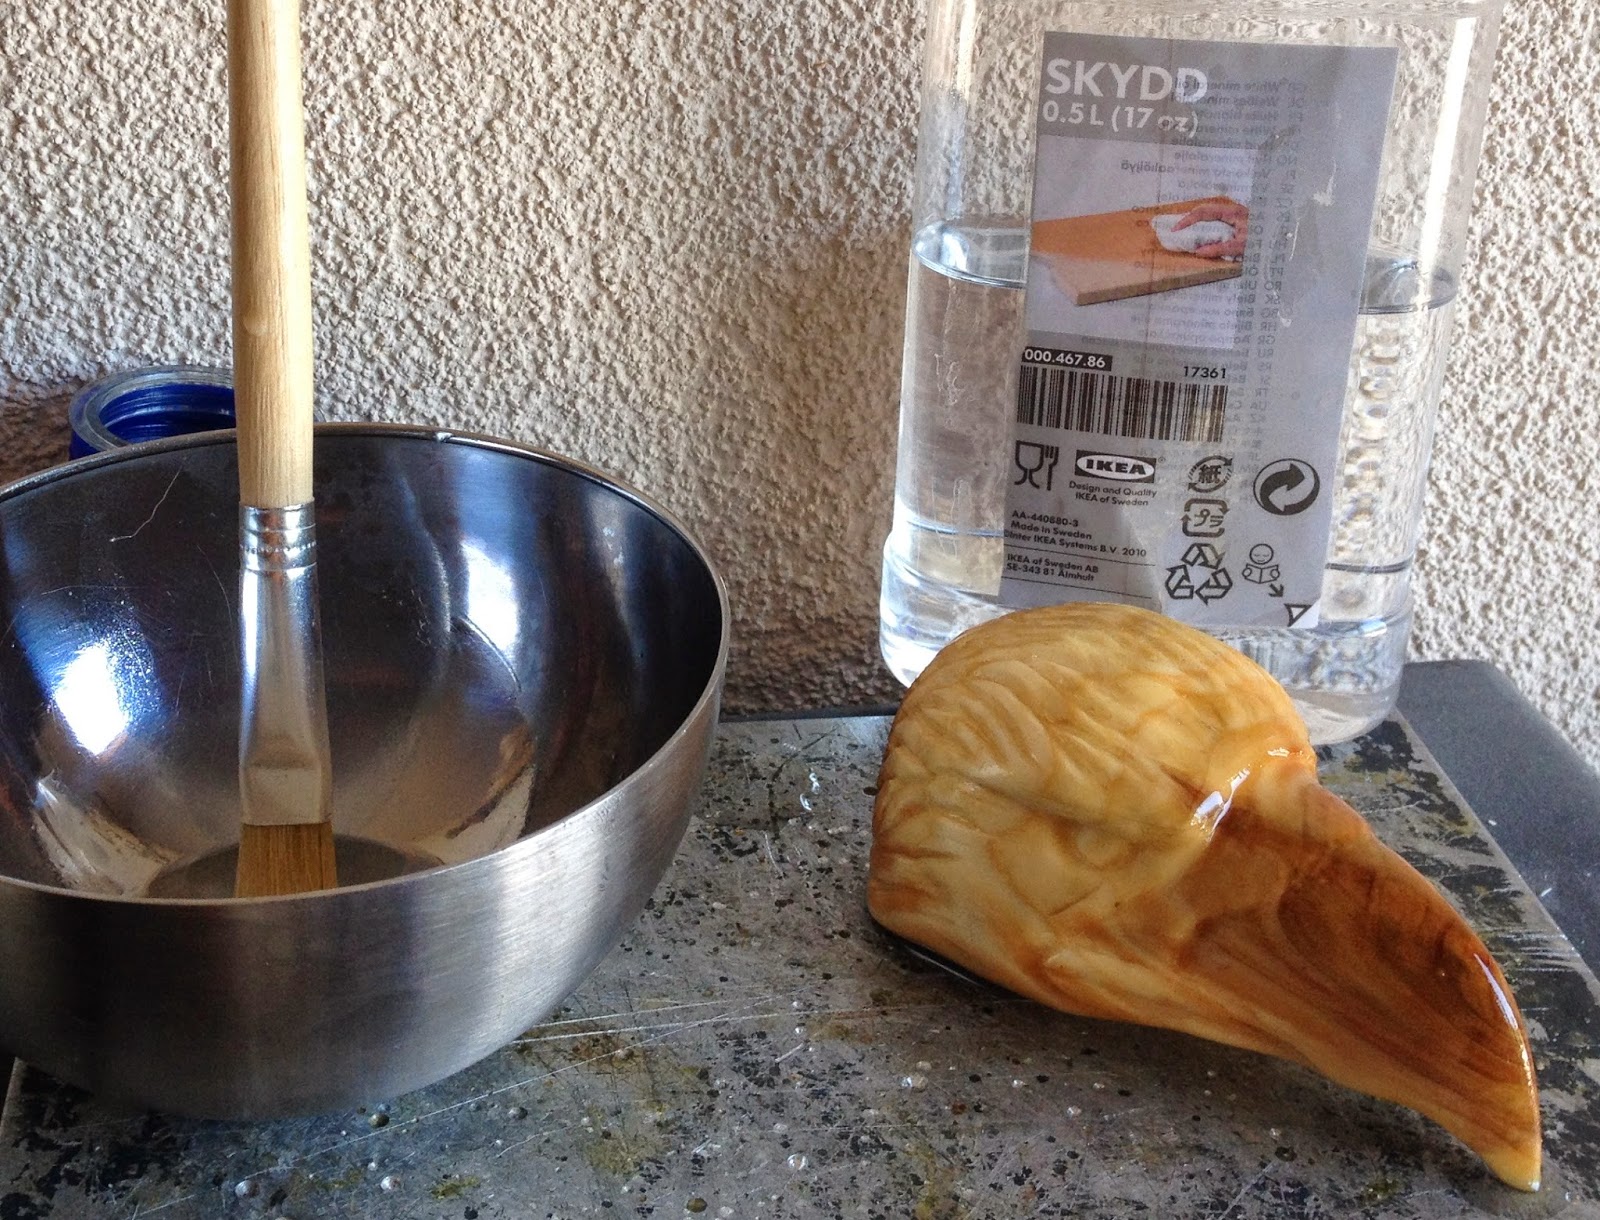
While experimenting for my eagle head hiking staff, I made a Willow hiking staff with leather grip and paracord lanyard.


It was interesting to make this stick into a staff, as I learned some things while doing it.


First thing I learned; be patient when you dry your stick. This stick was kept inside the house and because of that, it dried too fast and split as a result of that. I later learned, that you should dry your stick for about six months, either outside (in the shade)  or in an unheated garden shed. I noticed that the wood loses a lot of its weight when drying.


It is also best to leave the bark on during the process, although removing it before, as I did with this piece of willow, makes it far easier to remove it. It leaves a nice light colored wood too.

What I also learned; only hold your knife flat against the wood when removing the bark, to prevent scarring the wood. Scarring also contributes to the wood splitting while drying. Here is a scar near the rounded top end of the staff. You can see the wood just splitting at the scar.


Also: Cut the staff longer that the length you think you''ll need. The ends of the wood tend to split when drying.

This is the grip, made from some scrap leather that I had lying around, and the 550 paracord lanyard. Google 'how to paracord lanyard' for instructions on how to make it; there are literally hundreds of tutorials on Youtube.


The lanyard is mounted through a hole in the staff. Nothing went wrong here, so no real lessons in that ;-) I used 2x 1.5m of paracord. One length green, on length black. The loop fits loosely around my wrist when I hold the staff at the grip.


Also: Make sure that the camera focuses on the subject, not on the background. 

This stick has some interesting bumps at the lower end. I Left them in place and just sanded the whole stick smooth with sandpaper (100/200/400) and treated the staff with oil. It took only 4 applications on this staff. I suspect the it is not entirely dry enough (here comes the 'be patient' bit again)...


So this is the staff, it turned out nice, even if it is only as an experiment, except for the crack in the middle. Maybe I will fill it up later, or just leave it as is and just make a new one.


woensdag 6 augustus 2014

Building an eagle head hiking staff.

I admire raptors and the eagle is easily the most impressive of them. I Always try to spot birds of prey while traveling by car or bike and occasionally visit raptor shows. Although rare, it is possible to see the sea eagle around my hometown

While visiting the Teylingen siege (“Belegering van Teylingen”) in 2013, I saw one of the re-enactors hold a hiking staff topped with a wooden eagle head. Unfortunately I did note make a photograph of it, and was unable to find one afterwards.

Ever since then, I have wanted to build myself one of these. For a long time, wanting it was all I did, until I happened to cut down a conifer in my garden. 

A Piece of its trunk looked to be extremely suitable for carving the eagle head, so I started whittling it. Now I haven’t whittled wood since I was a teenager. And even then I hardly did anything but making sharp sticks.


As I had no reference to the actual staff except for the image in my mind, I set out to finding an eagle's picture en profile, which turned out to be easier than I thought.


So with some hesitation, I set out to carve an eagle’s head. The main tool being a utility knife.


Making the initial shape was relatively easy as it resembles a pointy stick fairly well. The soft wood on the outside is easy to carve. The harder wood on the inside is, well... harder.


However, what to do next? Fortunately, we have Youtube now. Imagine what it would have been like to have had Youtube when I was a teenager! But there it is now, Youtube to the rescue!


So now I knew more or less how to go forward. I decided to order some wood carving chisels on a Chinese website. While waiting for them to arrive I did some more shaping with the utility knife.

The chisels arrived in just over a week. A pleasant surprise, and excellent timing! I was just about ready for adding details.


With the head nearing completion, it was time to make the actual hiking staff. I had a branch in the garden shed that was discarded from a road construction project nearby. By now it has been drying several months, so it is ready to be transformed from branch to hiking staff. Again, it is the Internet that provides the required information. Diamond Willow Sticks: "Pure Art by Mom nature". Now I am not sure what type of wood I have, but I am sure that it is not willow. The basic principles are however applicable no matter what wood I suppose.


First, I cleared all the bits sticking out with a saw and knife. Then came decoratively removing part of the bark, and leaving it in place on other parts.


Once that was done, i cut the stick to length (so that the eagles beak will poke my eye out) and started smoothing it with progressively finer sandpaper (100/200/400).

I put a couple of M5 threaded inserts in both the staff and the eagle head so I can mount the eagle on the staff. This leaves me the option to easily switch the head to another staff in case I happen to find a more suitable and/ or more pleasing one.


After cleaning, I applied some IKEA 'Skydd' to the staff, a cheap white mineral oil normally used to treat wooden cutting boards and the like. And again, and again, and again. I Stopped counting the number of layers, but just went on until the wood absorbed no more.


I used the new chisels to carve out the 'feathers' on the head and then sanded it to a smooth finish. It is starting to look the piece!


Here is the staff at the current stage..need do do some more finishing.


The staff got a final coat of beeswax - Kruidvat Protect Bijenwas - which is actually a mix of carnauba wax and beeswax. It claims to be made natural materials, but smells very chemical. The picture below shows the lower end of the staff after waxing.


The Eagle head was treated the same. First sandpaper (200/ 400) and then a few layers of 'Skydd' and the 'Protect' wax...


So here it is, my very own eagle head hiking staff. Still not entirely finished as I want to add a leather hand grip and a feather streamer. I need to find the right material for that, so I will do that later.


donderdag 31 juli 2014

Trace of fellow blowgunneers.

While hiking in the Soesterduinen, I came across a trace of fellow blowgunneers. I Found a blowgun dart! Image what the chances are of finding one in an area like this.


But it happened. Proof!


The dart fits my 11mm blowgun, but is much heavier than my own needle darts. This means that it sinks a lot during its flight. Don't like it...


zondag 19 januari 2014

Building a 11mm blowgun with Aquarius mouthpiece.

.
This is a short instruction on how to build an aluminium blowgun for needle darts, shown here on the right (next to the big bore blowgun).

The blowgun is made from 11x12.8mm seamless, round aluminum tube, 1200mm long (bought from the local hardware store as curtain rod).

It is suitable for use with darts that have a 10mm diameter.

The blowgun has NO protection against inhaling the dart but does have a magnetic dart retention system.

The material for this blowgun costs less than €10, not including the darts.


The mouthpiece is made from the cap and neck of an Aquarius PET bottle. First, empty the bottle and cut off the bottle's neck as sketched below.
Remove the sliding sleeve from the cap and make a hole that the stem of the cap will fit through.

Remove the rim from the stem.

The sliding sleeve is then placed back on the cap with the flared side towards the bottle. Some glue keeps the sleeve on the cap. Remove sharp edges and burrs from both sides of the aluminum tube, and make a small taper on one side.


Use a conical reamer to widen the ribs inside the cap so that the aluminum pipe will be able to pass through.

Now, heat the modified cap in hot water from the tap to soften the plastic. Insert the tapered end of the aluminum tube from the bottle-side into the cap.Wear a glove and pus the aluminum pipe through the cap. Re-heat the cap if required. Let the cap cool down when the tube emerges from the other end.

Again, a rare-earth magnet will keep the dart in place just below the mouthpiece.

Fix the magnet to the outside of the aluminum tube with some paracord wrap.

Add some more paracord wrap as a handle.

Trim the clear plastic PET from the bottle to make it fit comfortably around your mouth, and remove sharp edges using some sandpaper.

And now, enjoy!